Learn the Heelflip — The No-Bullshit Guide to Landing Your First Flip
The heelflip is the trick that separates those who just roll from those who actually skate. Invented by Rodney Mullen in 1982, this heel flip remains one of skateboarding’s most satisfying moves. Here’s how to unlock it for good.
⏱ Reading time: 5 min
Prerequisites Before Attempting the Heelflip
We won’t lie to you. If your ollie isn’t getting at least 20 centimeters high, you’re wasting your time trying the heelflip. It’s the foundation. Without a solid ollie, everything else crumbles. Period.
Rodney Mullen invented this trick in 1982, after landing the flatground ollie. The logic is the same: you pop, you slide, you catch. Except here, your heel does all the work. And that’s exactly what makes this trick so addictive.
Before you start, check these three points. You need to be comfortable rolling. You need to be able to ollie while moving without thinking. And you need to accept that it will take time. Even 15 minutes a day can make a huge difference over a month.
Foot Placement — It All Comes Down to This
This is where 90% of beginners mess up. The heelflip, unlike the kickflip, relies entirely on the counterweight of your front foot. A two-centimeter error and your board spins out of control.
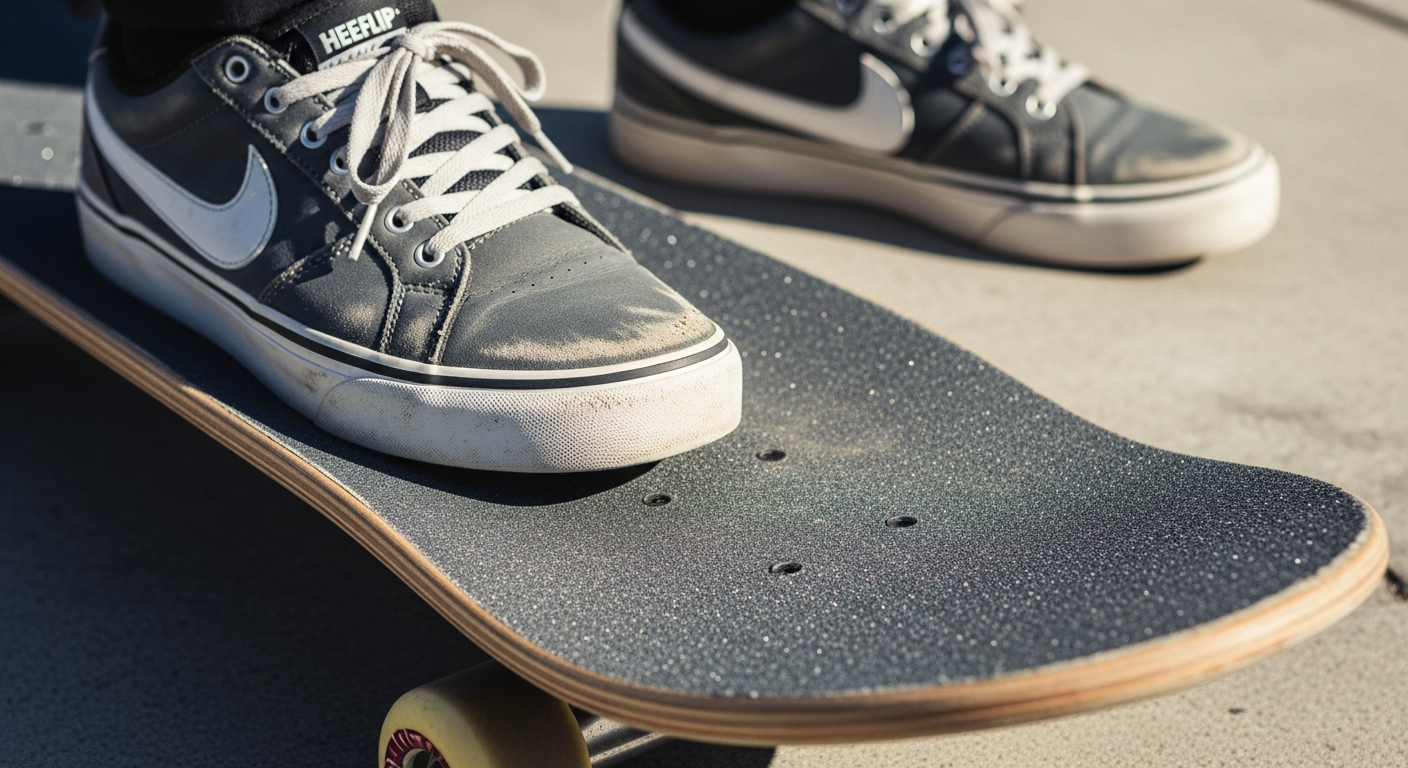
Back foot: right in the pocket of the tail, just like a classic ollie. The ball of your foot centered on the end. It’s what generates the pop. No compromises.
Front foot: just behind the front truck bolts. And here’s the key: your toes hang off the heel side of the board. Your heel must be firmly on the grip; it’s what will catch the nose to initiate the rotation. If your toes aren’t hanging off, you won’t have enough leverage to flip.
Tip from Neen Williams, the man with the cleanest heelflip on the circuit: slightly move your front foot closer to your back foot if the board flips too slowly. This micro-adjustment changes everything.
The Movement Broken Down into 4 Steps
Forget tutorials that throw 12 steps at you. The heelflip is 4 beats. No more, no less.
1. The Pop
Identical to the ollie. Your back foot slams the tail against the ground. The snap must be sharp and vertical. If you pop diagonally, your board goes sideways before you can even flip. Trust your ollie muscle memory.
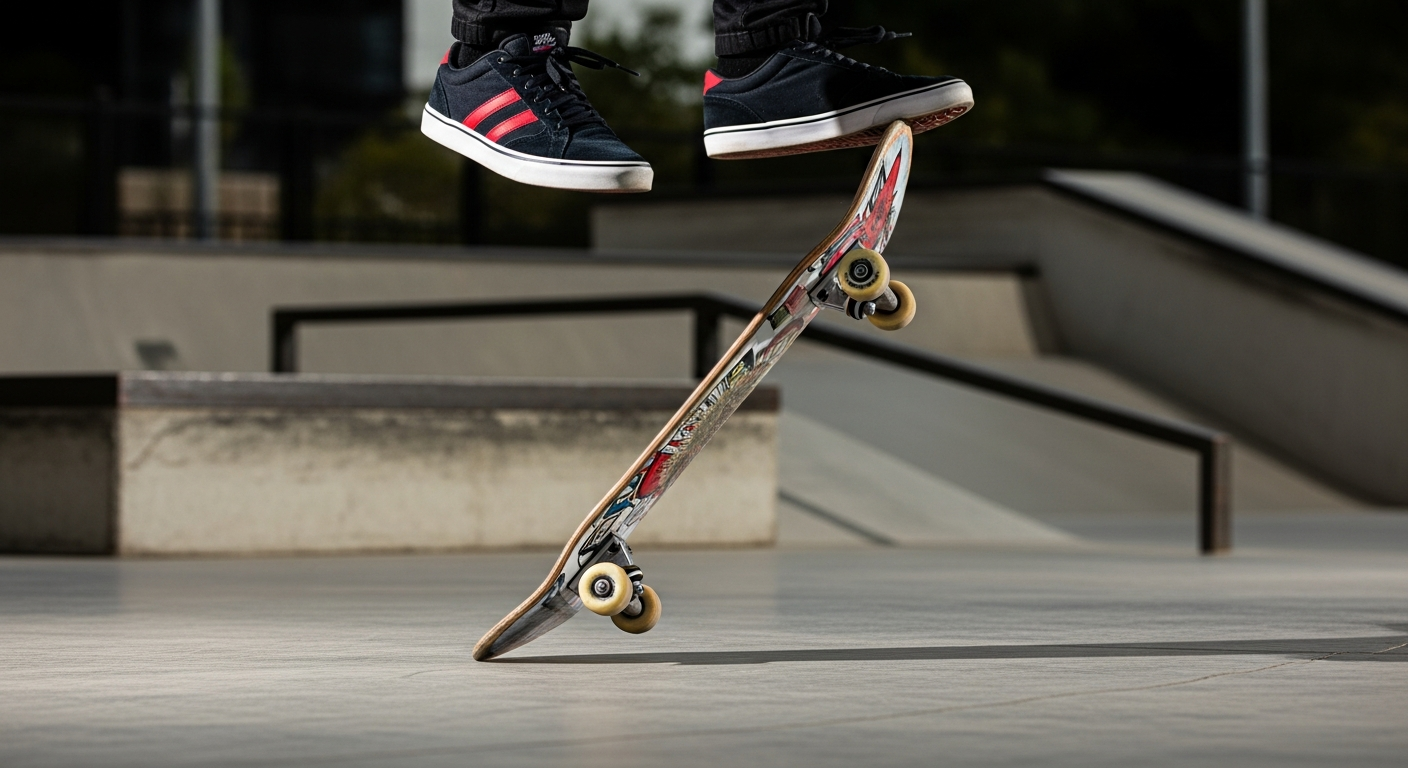
2. The Slide and Flick
As soon as the board leaves the ground, your front foot slides towards the nose. When your heel reaches the edge, you kick diagonally outwards. Not just forwards. Forwards AND outwards. This diagonal trajectory is what makes the board rotate cleanly on its axis.
3. Patience in the Air
This is the hardest moment psychologically. Your board is spinning beneath you and your instinct screams at you to catch it. Resist. Let the rotation complete. Keep your knees high, shoulders parallel to the board. Timing comes with repetition.
4. The Catch and Landing
Your back foot catches the grip first. Then your front foot lands. You absorb the impact with bent knees and roll away. If you land on the bolts, it’s a clean heelflip. If you land in the middle of the board, it’s still a heelflip. The important thing is to roll away afterwards.
The 5 Mistakes Preventing You from Landing It
Mistake #1: Kicking straight forward. If you only send your foot forward, the board won’t flip or will go behind you. The flick must go diagonally towards your toe side. That’s non-negotiable.
Mistake #2: Not enough heel on the grip. If your front foot is too centered on the board, you have no leverage to catch the nose. Let your toes hang off clearly.
Mistake #3: Turning your shoulders. Your shoulders must remain parallel to the board from start to finish. If you turn your torso, your whole body follows, and you land off to the side.
Mistake #4: Weak pop. Without height, you don’t have time to flip. Slam that tail like your life depends on it. More height means more time for rotation.
Mistake #5: Trying to go too fast. Start stationary. Then rolling slowly. Then at normal speed. Skipping steps is the best way to create bad habits that are impossible to correct later.
The Ideal Setup for Learning Flips
Your gear plays a direct role in your progression. A board that’s too wide, wheels that are too soft, or worn grip can turn a doable heelflip into an impossible mission. Here’s what works.
For flips, a deck between 7.75″ and 8.25″ is the sweet spot. Narrower is easier to flip but less stable. The Powell Peralta Flight Deck remains a benchmark thanks to its fiber construction that withstands impacts without delaminating.
As for trucks, Independent Stage 11 or Thunder Hollow Lights lighten the setup without sacrificing stability. For wheels, Spitfire Formula Four in 52mm offer the perfect compromise between grip and slide. And don’t forget: a new grip tape makes a real difference on the flick. If your grip is smooth, change it before you start working on your flips.
If you want a complete guide to setting up your board, check out our guide to the perfect beginner skateboarding setup for 2026. And for those still hesitating between Independent, Thunder, and Venture, we have a trucks comparison coming soon.
The heelflip isn’t a trick you learn in one session. It’s a trick you build. Each attempt etches the movement into your body. One day you’ll put your foot down, the board will flip, and you’ll roll away. That day, you’ll understand why Mullen invented it over 40 years ago. Some moves never get old.
We read every comment